Android Selected Button/List Screenshots
Android

Android says “what selector?” – list items & buttons

The Butt is On

I’ve been optimizing and cleaning up the AlertMe for Android app to put into the Google Play marketplace, and after using drawable shapes I figured that it was time to throw away those duplicate button images. The original used a technique familiar with web developers/designers: change the whole image according to the state of an element, in this case a button:

<?xml version="1.0" encoding="utf-8"?>
<selector xmlns:android="http://schemas.android.com/apk/res/android">
    <item 
        android:state_enabled="false"
        android:drawable="@drawable/ic_home_status_home" /><!-- default state -->
    <item 
        android:state_pressed="true" 
        android:state_enabled="true"
        android:drawable="@drawable/ic_home_status_home_pressed" /><!-- pressed state -->
    <item 
        android:state_focused="true" 
        android:state_enabled="true"
        android:drawable="@drawable/ic_home_status_home_focus" /><!-- focus/hover state -->
    <item 
        android:state_enabled="true"
        android:drawable="@drawable/ic_home_status_home" /><!-- default state, just in case -->
</selector>

All 3 images; a bit repetitive, no?

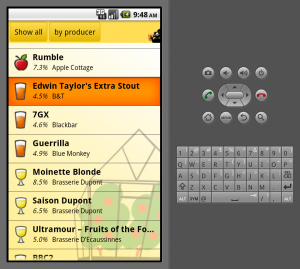
All rather neat so far. Now, developing for mobile you start to appreciate things like space – particularly when you phone is rather low on it (true story) – and the same image is kind of wasteful. Images are the worst to keep around for mobile application because they can only compress so far – while text is rather easy. When I did the Letchworth Beer Fest app I used shapes to define a background rectangle and a single image over the top, so now I save on 2 less images and a cleaner looking ‘button’ to boot:

<!-- excerpt for 'pressed' state: -->
<item android:state_pressed="true" android:state_enabled="true">
    <layer-list>
        <item>
            <shape>
                <gradient
                    android:startColor="@color/button_pressed_light"
                    android:endColor="@color/button_pressed_dark"
                    android:angle="270" /><!-- gradient box, just because -->
                <stroke
                    android:width="1dp"
                    android:color="@color/button_pressed_dark" /><!-- 1dp border -->
                <corners android:radius="3dp" /><!-- neat - round corners -->
                <padding
                    android:left="10dp"
                    android:top="10dp"
                    android:right="10dp"
                    android:bottom="10dp" />
            </shape>
        </item><!-- end box -->
        <item><!-- now overlay the image on top: -->
            <bitmap
                android:src="@drawable/ic_home_status_home"
                android:gravity="center" />
        </item>
    </layer-list>
</item>
<!-- now an excerpt for default state -->
<item android:state_enabled="true">
    <layer-list>
    <item>
        <shape>
            <solid android:color="@color/button_default_light" /><!-- can be anything, but I've made it transparent -->
            <corners android:radius="4dp" />
            <padding
                android:left="10dp"
                android:top="10dp"
                android:right="10dp"
                android:bottom="10dp" />
        </shape>
    </item>
    <item>
        <bitmap
            android:src="@drawable/ic_home_status_home"
            android:gravity="center" />
    </item>
    </layer-list>     
</item>

List item select?

When I tried to use the same states for list items in my odd/even rendered lists, I switched over from setBackgroundColor to setBackgroundResource. However I found there wasn’t a change in the pressed or focus states. Some Googling later I found these states worked for me:

<?xml version="1.0" encoding="utf-8"?>
<!-- for the 'odd' background; you can guess there is another file using '@color/menu_even' -->
<selector xmlns:android="http://schemas.android.com/apk/res/android">
    <item android:state_enabled="false" android:state_pressed="false">
        <shape>
            <solid android:color="@color/menu_odd" />
        </shape>
    </item>
    <item android:state_pressed="true" android:state_enabled="true">
        <shape>
            <gradient
                android:startColor="@color/button_pressed_light"
                android:endColor="@color/button_pressed_dark"
                android:angle="270" />
        </shape>
    </item>
    <item android:state_focused="true" android:state_enabled="true">
        <shape>
            <gradient
                android:startColor="@color/button_selected_light"
                android:endColor="@color/button_selected_dark"
                android:angle="270" />
        </shape>
    </item>
    <item android:state_selected="true" android:state_pressed="false">
        <shape>
            <gradient
                android:startColor="@color/button_selected_light"
                android:endColor="@color/button_selected_dark"
                android:angle="270" />
        </shape>
    </item>
    <item android:state_enabled="true">
        <shape>
            <solid android:color="@color/menu_odd" />
        </shape>
    </item>
</selector>

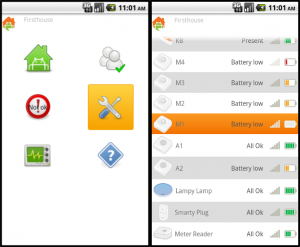
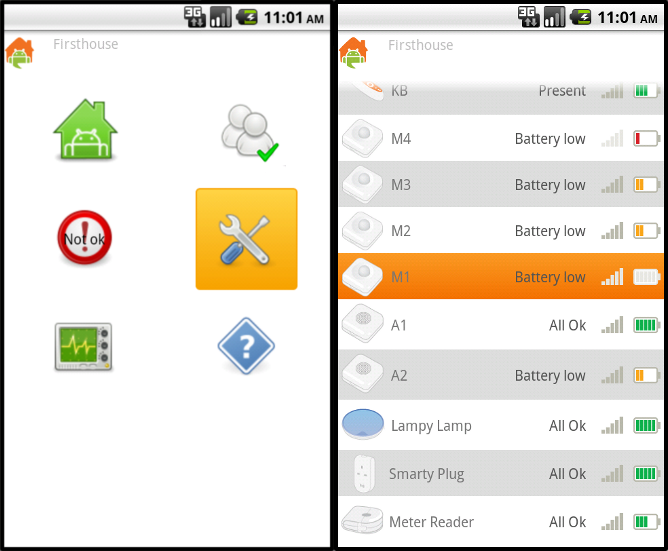
The result is now a more unified look-and-feel as the button and list item states use the same focused and pressed highlighting colours.
Android Selected Button/List Screenshots

Screenshots of the a pressed button (left) and a focused list item (right)

Standard
Random

Sticky

Hmm, my left control key is sticky – having splashed the keyboard with a little bit of beer probably didn’t help.

Remember kids, don’t drink and code! Illegible code may not be the only result! 😐

Standard
Beer app icon set
Android, Graphic

Beer app icons

When I was writing the Letchworth Beer Festival app I knew I had to have visual cues to aid scanning the long list of beers and ciders/perries. Failing a to find any free icons within the same set, I turned to Inkscape and the Tango guidelines. Here are my personal guidelines that I have used:

  • Resize the document to the final size in icons – you can easily review the generated PNG. And it’s a vector, so if you want it larger then just do so in a new and larger document.
  • Keep things simple applies here as the smaller they get, the icons lose their details but the user still needs to recognise what it is. Thick-ish bold lines and simple shapes are key.
  • If the icon set represents a ‘type’ or well-defined option, try to restrict the colour palette. I did used the restricted Tango palette, but the each of the icons have an obvious main colour – this helps to ease scanning the list (I’d hate to do ‘pyder’ – a combination of apples & pears!)
  • Skip the bottom surface shadow when you are using them in a list that has a ‘line break’. This is a personal preference as the line denotes a division between items. If I styled the list without them I would probably have the shadow to enforce an ‘invisible line break’ between items. But since this is for a small screen, a proper line is more user-friendly.
Standard

Huh, by strange coincidence there’s this beer festival that’s coming up very very soon…

Preview of something to come

Update (20120914): From hitting publish I’d guess 1-3 hours to find it

Android, Random

Oh hey, a preview

Image
Rants, Web

Dear Internets,

It’s been 20 years, there is a long-established consortium that develops standards for viewing data on the web and the method of describing presentation semantics of web documents is now 15 years old. Javascript is similarly 17 years old now.

So then, why, for-the-love-of-fucking-christ, do I find:

  • Tables for formatting
  • Use of deprecated tags (like background on said tables
  • Flash.. showing nothing but the logo
  • Using Javascript onload.. inside opening tags and preloading images

This all would be forgiven if the year read 1996. But then you have PNGs that use the alpha channel and Google Analytics.

You are a troll….. aren’t you?

Dear Internets..

Aside
Rants, Web

Well, looks like Twatterers have gotten to see more of the awful future in using the SEO tool service (hah) – now even tackling 3rd party clients.

After Facestalk, I am reluctant to go on any more social networking adventures* seeing that it all seems futile. Though the app.net alternative is an interesting one – I can’t shake off the feeling that any similar micro-blog services are just the same wheel, ‘reinvented’.

Until I find a medium more suitable, I guess it’s slow rants on a clunky website for me. At least I’ll have myself to blame when this ‘service’ breaks or goes down.

* Still using FB for keeping tabs on family members, some who are stuck for similar reasons. In addition, I haven’t updated my Google+ account either..

Where can one rant, oh internets?

Aside
Random, Rants

A stunning response to a bigoted Kindle owner (pity that the first couple of responses are a bunch of asshats.)

..Being married is a joy.

The idea that some organizations would spend millions of dollars to deny loving couples that joy (along with the tangible societal benefits) is just plain mean spirited…

America was founded on the idea of freedom. What could be more supportive of freedom than letting people be free to use the word “marriage” to describe two people in love, who’ve committed to spending their lives together?

And the world receives +1 in ‘Faith in Humanity’. Now if only there were enough points to level up, grinding seems so hard these days..

Link
Random, Rants

What you want to say to your figurative alcoholic brother – best metaphor about analysing faults you’ve found as an expat of your home country. This may be from an American perspective, but makes me wonder about all the countries I’ve been to (not many, but plural). Reminds me that I am still yet to write my ‘compare and contrast’ piece about the UK..

Link
Halftone gradient
Graphic

Simple Halftones in GIMP

Playing around with the background of my ‘professional front‘, I wanted to create a neutral base for a series of rotating background images. I devised that a halftone effect would be simple but have the impact I wanted, though I’ve never tried to generate them from scratch before. Based on bktheman34’s Halftone Gradient GIMP Tutorial I discovered it isn’t too difficult.

My steps, for a black foreground to fade into white:

  1. Create a new file at the desired size with a white background, ensure that the default colour selections are set (black foreground, white background).
  2. Ensuring that black is selected as the forecolour, create your desired gradient effect; I used a radial foreground to transparent.
  3. Create a layer below the one with the gradient in the foreground colour (black)
  4. With the gradient layer active, select FILTERS > DISTORTS > NEWSPRINT, under SCREEN choose INTENSITY
  5. Set CELL SIZE to 40, OVERSAMPLE to 5, click OK
  6. Continuing with the distorted gradient layer active, select COLOURS > LEVELS..
  7. Under Output Levels, set the lower slider (which is set on the black end) all the way to the right side (the white end), click OK
  8. You now can choose to flatten the image or select the gradient layer as needed.
White Halftone Gradient

White Halftone Gradient, with the ‘foreground colour’ (black) layer set to invisible

To create a black gradient, continuing the steps:

  1. Merge the white gradient layer to the black ‘foreground’ colour layer
  2. Choose COLOURS > COLOUR TO ALPHA. Colour select ‘white’ (ffffff) in the From box and click OK
Halftone gradient

Black halftone gradient, with the ‘background colour’ set to alpha

Standard