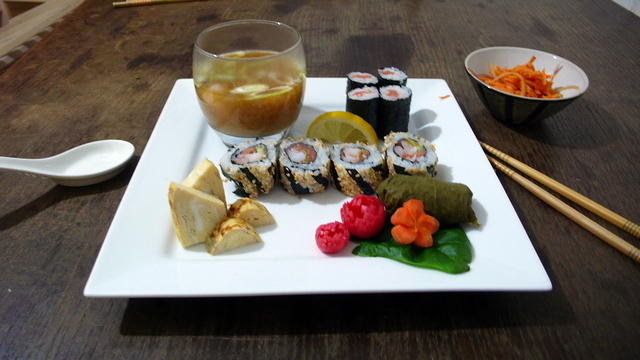
Dinner!
I probably should schedule these nights regularly again, but in a bid to eat healthier I’ve felt discouraged in making sushi for dinner due to the high concentration of carbs. But being the last day of the century for the day, month and year (well, the last 2 digits anyway) to be the same.. Ah fuck it, it was for lulz. And using up some smoked salmon in the fridge.
Doing a dinner like this I find takes quite some time and complete reign of the kitchen. My time management is getting a little better which coincides with regular practise for rolling out the maki but my knife skills are still rather lacking in speed and precision.
But this isn’t a post fishing for reassurances for improving these deficiencies, it’s about food porn! Actually, it’s the best way I’ve found to document these dinners if I want to repeat any elements from them.
Side dishes
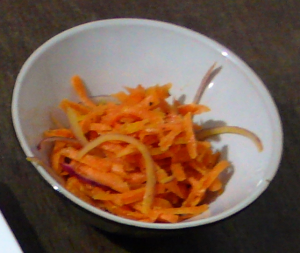
Carrot salad with wasabi dressing
I wanted to serve a light salad with a vinaigrette-style dressing, but I have little choice for things available in a hurry. When you have plenty of carrot, you can make a French-style carrot salad but I took this as inspiration. Rather than use mustard, I used some dried wasabi powder that we have in the freezer with rapeseed oil for the dressing. If repeating, resting the salad in the fridge generally brings out the nose-clearing spiciness of wasabi so be wary – I still found it not potent enough but Yvan would disagree!
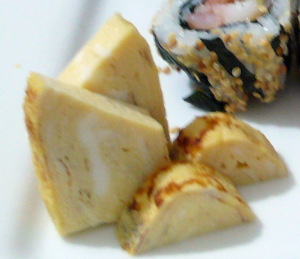
Tamagoyaki
Apart from the main dish containing the bulk of the protein I felt that I had to add some tamagoyaki as it’s simple to make and provides a flavour contrast to all the other items in the meal. In retrospect, I should of cut the block along the length to avoid the cutoffs – though these weren’t wasted as much as they were “chef’s perks” 😉
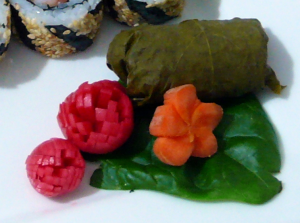
Pickle, veg & stuffed vine leaf
The cigar-shaped bundle is one of the last of my home-brined vine leaves stuffed with a mixture of seasoned shiitake and chestnuts with sushi rice. The chestnuts were a little old, and I figured that if they were lacking water (as they are when fresh) then it can be reintroduced through simmering – it would of been fully successful if given more time (see the soup details).
The bright pink/red ‘flowers’ are a staple of my bento, consisting of appropriately cut ‘radish chrysanthemums‘ that have been salted and stored in rice vinegar in the fridge. Though it’s commonly used technique for turnips, I’ve taken the recipe from my second-hand copy of Emi Kazuko’s book.
The leaf was a rescued spinach leaf from the garden – the frosts and few remaining stubborn caterpillars have been devastating most things green outside. The carrot flower was uncooked and hand carved. With smaller carrots that cannot be cut with a cutter like this one was, you are better off trimming by hand along the length of the carrot prior to the petal sculpting stage.
Sushi
It was during late in the afternoon that Yvan mentioned “Let’s have smoked salmon sushi for dinner” after recalling that there was a spare pack he didn’t use for a previous dinner. He also suggested some avocado, but my luck in finding such a thing in our local grocery store I knew I had to try something else..
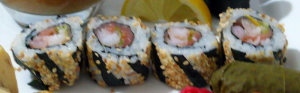
Salmon helix maki
The star of the show was uramaki (inside-out roll) that contains smoked salmon, spring onion, lemon (rind and flesh) and cooked prawn. The ‘helix’ refers to the outside strips of nori that was placed in that manner, then rolled in sesame seeds. The appearance was influenced by an old clipping I saved from an ad for ‘American rice’, it featured what appeared to be paper-thin carrot and cucumber covered rolls (which replaced the nori) that were placed on the diagonal. Knowing that the nori length would need to be longer than the rolls, I cut the uramaki in half and used strips cut along the width of a whole sheet to avoid wastage.
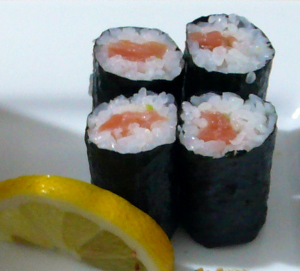
Salmon hosomaki
With more smoked salmon looking forlorn and little other choice, it was a no-brainer to make hosomaki (thin rolls) as part of the sushi course. These contain the thinnest slither of green onion to offset the oily fish.
All the sushi turned out fine apart from not being able to cut straight and not being able to cut them at uniform lengths.. boo!
Soup
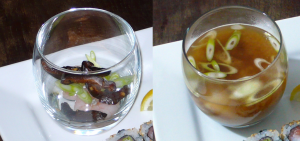
Miso soup filling / Miso soup served
I’ve tended to use our whiskey glasses for the miso soup as it gets to show off the items inside before I serve it hot. During the cooking time of the entire dinner, some water and stock was on the go, ready at the last minute for the miso to be mixed in at a lower heat. In the course of preparations, one whole chestnut (if you recall they were lacking in water) was accidently dropped into the bubbly stock but I didn’t bother fishing it out as I had used all the chestnuts needed. So at the very end, after completing the soup with soy and mirin simmered shiitake slices, green onion and cooked prawn we ate the chestnut that was still in the soup the entire time. Result: a rather interesting way to revive chestnuts rather than abandon them to the compost; it was juicy and slightly more savoury from the time in the broth.
Task breakdown
I surprised myself how I managed my time for this – 5 years ago I would of probably taken another hour to get everything ready. Excluding the steps in advance, I took only 2 hours to make 6 items plus edible garnishes – a personal record.
- (In advance) Prepare radish chrysanthemum pickles
- (In advance) Toast desicated chestnuts
- (In advance) Reconstitute shiitake
- (In advance) Reserve spinach leaves
- Prepare carrot salad, and refrigerate. Cut out carrot flower garnishes. Peel 3-4 chestnuts
- Prepare rice – but don’t switch on the rice cooker yet
- Cook tamagoyaki
- Trim and slice shiitake. Cut lemon and reserve some rind and flesh for uramaki. Chop up chestnuts
- Boil water and place stock cube (home made venison stock). Start the rice cooker to ‘cook’
- Simmer shiitake and chestnuts together in soy and mirin. Rinse out vine leaves
- Prepare sushi rice and cut green onion for maki filling, take off mushrooms and chestnuts from heat when most of the liquid has evaporated
- Carefully pick out chestnut pieces and some slices of shiitake in a bowl. Add about 2 tablespoons of sushi rice and mix
- Make vine leaves stuffed with rice, chestnut and shiitake
- Make inside-out roll with prawn, smoked salmon and green onion (nori is halved along the width rather than the length of the sheet, using one half per roll). Cut uramaki into 2 exact halves
- Cut 5-6 nori strips about 6mm-wide along the width and arrange carefully around one half of the uramaki. Repeat with the other half. Place one on top of clingfilm and sprinkle toasted sesame seeds along gaps. Wrap in the clingfilm and repeat for the other half and set both aside
- Reduce the heat to stock and mix in appropriate amount of miso (can be done in phases between rolling the hosomaki)
- Prepare the hosomaki with smoked salmon and green onion (nori is halved along the length rather than the width – convenient for 2 diners)
- Cut lemon slices for garnish and green onion for miso. Slice up tamagoyaki and sushi rolls. Plate up