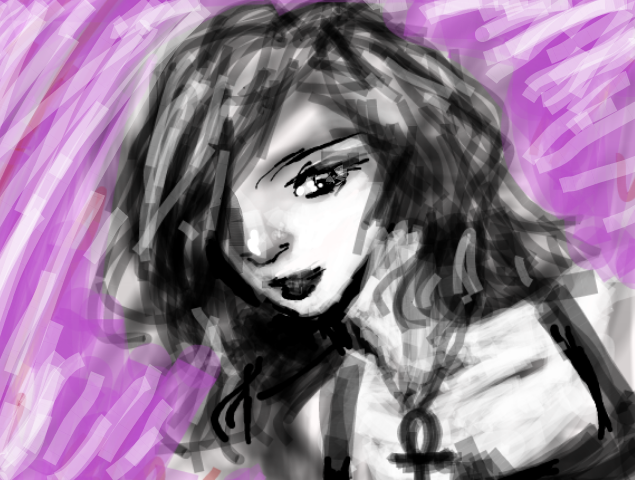
I’m no professional designer, but I do feel the need to get some sketching done once in a while. Sometimes I feel the urge to make a full colour image like my TNP fan art and various (now more-difficult-to-find) mini illustrations for Yvan’s blog. Without the formal training, and the expensive professional tools, I’ve used GIMP for years. For cleaner lines I’ve been including Inkscape to my routine – as SVGs can be easily resized without loss of detail. Look ma, no pricely-licensed software!
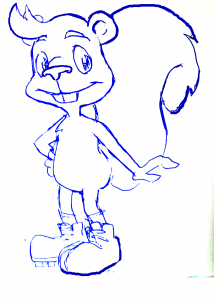
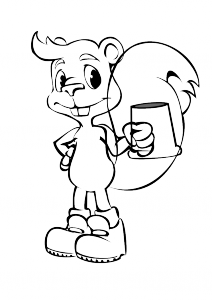
The sketch to convert
The comic industry had to start off without computers in the beginning.. If you prefer the use of the ever-reliable pen/pencil and paper method like me you will need to come up with the cleanest copy of your subject to make the computer cleanup faster. Try to keep your guidelines as light as possible or in a colour you can ignore while you complete the sketch in a dark colour. It is common to use yellow pencils, or the aid of a lightbox and another piece of paper.
In the case of this drawing, I had a few ideas already in mind and used the best sketch. Though the main parts – the face and body – were clearly defined I planned to clean up the other sections in GIMP (it was also necessary as I photographed, rather than scanned, the sketch). I definitely could of created another cleaner sketch but I didn’t have the means to trace anew without losing some of the nuances with the lines, but for what it was worth the parts I didn’t detail (the legs/feet, arms) I was planning to make different interchangeable versions. GIMP is used to make the contrast much clearer from the original scan and an opportunity to correct rough parts. Of course, you are sufficient with a tablet then drawing straight into GIMP is nothing new.
The clean line
After processing the sketch to be as clean as possible, I import the image (just a link rather than embed) into a new SVG page in Inkscape. Then, with a Path → Trace Bitmap I produce a path of the sketch. After the path is made I can remove the imported bitmap and process the raw path.
At this stage, the aim is to ensure that the lines are smooth and crisp. If you need to make replaceable elements, create separate layers so it is easier to manage. For breaking up parts of the image faster I created duplicate layers and removed sections with the path tools as described here (though the “select offending nodes then remove from path” method is also effective).
Here, I have separated the arms, tail and beer mug from the main body. This way, not only can I produce better looking sections I can reuse them for other versions of the image. For example the forearm can be drawn holding something else like a flag rather than the beer mug. Though it is not seen, it makes sense that these individual layers are ordered from fore- to back- grounds.
Adding colour
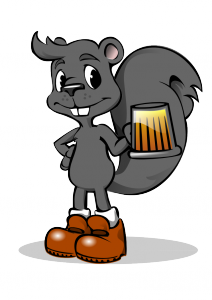
Now, the fun starts. For each of the separate layers define by any means necessary paths to place behind the sketch-line paths. As with the line art, these paths are borderless, filled blobs. When you are satisfied with the colour, then you can add finer details like shadows and textures.
As the lines were already black, I was able to keep my shadow paths (with the exception to the bottom round shadow) as a separate layer above all the paths. Because the lines were simple, I also did this to the highlights (shine on the beer mug, boots). Both the highlights and shadows are semi-transparent so they can be reused for different colour schemes.
Name it; then go forth and reuse
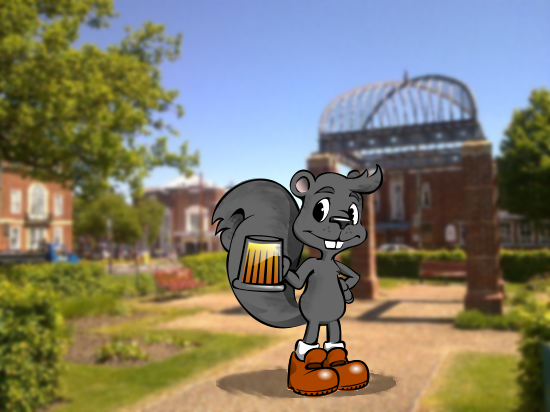
As the sketch is now in SVG you can produce higher quality versions in any size you desire. The first illustration was produced by simply importing the sketch into GIMP and flipping horizontally onto a blurred background. Then final touch ups were made to try to create more of a fur texture and roughed-bottom shadow.
I had started to brainstorm name for the poor squirrel sketches but wasn’t satisfied with one until it started nearing completion. If you may know the background and the relevance of the beer mug then you could make an educated guess that it’s my take on the logo of the CAMRA-run beer festival down in Letchworth Garden City. My complaint is that ‘Lloyd’ needs to be a black squirrel – a common mutation of the grey squirrels in these parts – but I need to explore how to keep the line work from ‘fading into the background’.
For now, I’m quite happy how he’s turned out. I can tweak the colours later just by changing the path fill colour. Hope to see you around more often, Lloyd!
